Showing posts with label #gardening. Show all posts

Tuesday, February 2, 2016

Mrs. Greenhands - Dandelion Salad


Happy Groundhog Day - a gardeners indication to see if spring will make an a early appearance. During the winter, not much is growing and gardeners are chomping at the bit to get started. Gardening catalogues are flooding in and you are planning your fantastic garden for summer 2016. However, you can probably find dandelion leaves poking their heads up and this is one of the plants that blooms very early in the spring. Here is a recipe using dandelion leaves ... afterall, 
weeds are in the eyes of the beholder.


Pick tender young leaves for salads - before the flowers bloom - they're great mixed with other pungent greens such as cress and arugula, and dressed with a good vinegar. Since the dandelion part of this recipe is so easy, I will also include directions on how to make great vinegar (although this takes 4 weeks to get the full flavor).
Ingredients:
  • Dandelion and other pungent greens
  • 2 hard boiled eggs, chopped
  • ¼ onion, chopped
  • 6 tbsp extra virgin olive oil
  • 1 tbsp balsamic vinegar
  • 1/2 tsp of your favorite mustard
  • 1/2 tsp mayo
  • 1-2 cloves of fresh garlic
  • handful of pine nuts or sunflower seeds
  • salt and pepper to taste
  • Garlic croutons (optional)
Directions:
Put all the ingredients, expect greens and eggs, together in a bowl and whisk vigorously until emulsified. Put greens and eggs in large salad bowl and pour mixture over your fresh greens. Gently mix salad until greens are lightly covered. Garnish with garlic croutons if using.


Tuesday, January 26, 2016

Mrs. Greenhands - Growing Spourts


Now that winter has a firm grip on the Bluegrass, most gardeners are anxious to start planting indoor seeds to produce seedlings for the winter garden. One indoor gardening activity will help feed your appetite - growing sprouts. It is very easy to grow a variety of sprouts, and it is a fun activity for entire family. It requires no special equipment and you don't need any horticultural experience to do it. There will be quick growth, so you won't lose interest. You can eat sprouts five days after starting the project. 

Equipment:
*A glass jar any size (a bigger jar means more sprouts).
*Cheesecloth to cover the jar opening. (You can also buy a special sprouting jar, but it is not necessary).
*A rubber-band to secure the cheesecloth (it needs to be tight).
*Alfalfa, mung bean, clover or other seeds of your choice. (After you have done this a few times, you'll develop favorites).
*Water (Distilled is best, but tap will do).


Instructions:
Day 1
*Cover the bottom of the glass jar with your seeds for sprouting.
*Cover the seeds with 2-3 inches of water.
*Cover jar with cheesecloth.
*Secure with rubber-band.
*Place jar upright in a dark, cool cupboard.

Day 2
*Drain water from jar. (There is no need to remove the cheesecloth, you can rinse and drain through it.)
*Rinse seeds.
*Drain again. (The seeds should just be damp, not standing in water).
*Place jar back in cool, dark cupboard, only this time on its side (this will allow sprouts to grow evenly).


Days 3&4
*Rinse seeds.
*Drain.
*Place jar back in cool, dark cupboard, on its side.
*Repeat several times daily to discourage fungal growth.

Day 5
*Drain water from jar.
*Rinse sprouts well.
*Harvest sprouts.

Why grow sprouts?
Most people don't realize sprouts are full of protein. They are an easy to grow, plant based protein supplement for vegan and vegetarian diets. They make a delicious fresh addition to salads and sandwiches in winter months. By growing your own sprouts, you can have fresh "garden" produce all year. It's as easy as 1, 2, 3.

Tuesday, January 19, 2016

Mrs. Greenhands - January planted bulbs

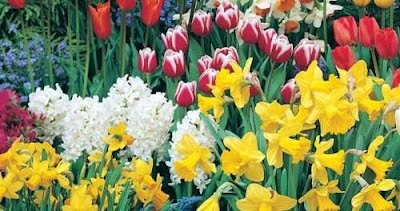
If you are like many gardeners, you have visions of beautiful spring bulbs emerging and blooming as the cold winter starts to lessen its hold. You relish the sight of dainty snowdrops, purple crocus, yellow daffodils, pink hyacinths and multi-colored tulips - a sure sign that spring is on the way. You probably bought dozens of dozens of bulbs this fall with visions of gorgeous blossoms for this spring. But like many gardeners, your visions may have been greater than your time and energy to plant the bulbs.

The first thing you need to do is check over your bulbs to make sure they are still healthy. You don’t want them to be soft or show any signs of damage. Just as with fall planting, you want to make sure your bulbs are firm and healthy.
So here you are at the beginning of a New Year with dozens of unplanted spring bulbs and you have many regrets about not getting those expense bulbs into the ground. Is it too late to think about planting these bulbs? Not really – as long as the ground is not frozen and you are able to work the soil, then it is not too late to plant these precious bulbs.

Next is preparing the planting beds. Most bulbs are planted in mass for a more visual display when they bloom. Check your bulb packaging for the appropriate planting depths, but a good rule of thumb is as follows: 5 inches for smaller bulbs like allium, crocus and grape hyacinths; 8 inches for medium bulbs like daffodils; and 12 inches for larger bulbs like tulips.

Pick a warm day in between cold spells and dig your bed to the appropriate depth. Loosen the soil in the bottom of the bed and work in some Bulb Booster or another 8-8-8 fertilizer. Space the bulbs in the bed according to the suggestions on the package. Mix the soil removed from the hole with about half organic matter – like compost – and replace half of it over the bulbs. Water the bulbs thoroughly and then add the remaining soil. Water again and then mulch the entire bed with about 3 inches of shredded leaves, pine straw or other available mulch.

January-planted bulbs will normally bloom later than those planted last fall, but most should flower this year. Even if they do not bloom, they will produce green leaves which will help to nourish the bulb for future years.

Tuesday, January 12, 2016

Mrs. Greenhands - Unusual gardening ideas


During this time of year, especially this year with its mild temperatures, many thoughts turn to garden. Now is the time to start planning what your garden will be for the coming growing season. 

You are probably receiving all types ofgardening and seed catalogs in the meal and your visions are full of all the gardening possibilities.
This year, maybe think more about container gardening. Container gardening gives you some advantages over regular gardening:

1. Contains warm sooner than the ground soil, so you are able to plant some crops sooner.
2. You can place containers where you like them in the garden.
3. Containers are easier to water and maintain than regular garden bed.

There are many things that can be used as a container for gardening: wheelbarrows, old buckets, and old cooking pots, anything that will hold soil can potentially be used to garden with.


One of my favorite items to use in gardening is used tires – either car or tractor tires. They can be used for all types of gardening, or as compost heaps. Place them in the garden, fill with good garden soil and presto, you have an instant garden.

This year I found the pictured flower garden and I have plans to make this for my coming gardens. It is basically several car tires painted different colors and stacked in varying order. When the tires are in the shape you want them, fill with garden soil and plant. Instant beauty and an easy way to have color all through the growing season.

Tuesday, January 5, 2016

Mrs. Greenhands - Gardening journals


January is a great month for gardening – not digging in the soil or nurturing flowers, but in planning your new gardens with the use of gardening catalogs. At this time of year, gardening catalogs are arriving in mailboxes and email inboxes are full of gardening specials. It is so fulfilling to clip photos and information of new plants and flowers into your gardening notebook or journal.

In addition to including your dreams in a gardening journal, it is worthwhile to record current day to day information from your actual gardens. You can start by including the daily temperature ups and downs as well as the actual weather conditions. You will also want to note the emergence and blooming of each month’s flowers. It is fun to look back from year to year and see when the first crocus or snowdrops bloomed.


If you do not have a gardening notebook or journal, now is the time to start on and fill it with you wishes and expectations for the coming gardening season. Use your journal to plan new garden spaces or to expand current areas with new species of plants, flowers and vegetables. Gardening journals will keep all of your notes for years to come and will allow to you look at your gardening progression throughout the years.

When you have formed a habit of recording the day-to-day conditions of your garden – the plants, the challenges, what you hope for the future – you can start to add articles and research about a new plant you would love to own. As your journaling grows, you will wonder how you were ever able to garden properly without the use of your journals and notes.


Why not make it a gardening New Year’s resolution and start a gardening journal today. If you live in the Bluegrass Region, then you can record the snowfall we are having, as well as the high and low temperatures. When the newest gardening catalog arrives in the mail, plan out a new perennial border or a kitchen garden. Dream of plants to include in current gardens and work up an agenda of how you are going to meet your current gardening goals. Journals are a way of keeping you current in the gardening world and to keep you involved in gardening research.